How do I setup CareIQ users on EMAS manager?
How to activate user access between CareIQ and EMIS using EMAS Manager

Janu
Last Update 4 years ago
In order to send Messages in CareIQ and saved directly in EMIS, you will need to have the following settings updated. Please note that this feature is only available for English practices.
It's a little tricky but we've got a bunch of helpful screenshots to help you along the way.
It shouldn't take more than 5-10 minutes.
There are 3 steps involved:
- EMAS Manager
- Activate Application
- User Setup
Please note - you'll have you have to repeat User Step for every new user you want to use CareIQ
EMAS Manager
EMAS manager is used to manage your practices' external applications - like CareIQ.
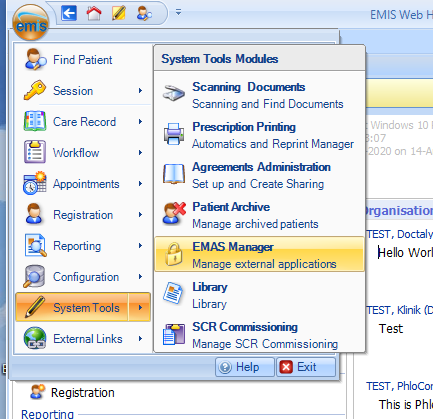
Head over to EMAS Manager by:
- Clicking on the blue bubble on the top left of EMIS
- Hovering over "System Tools"
- Clicking on "EMAS Manager"
If you don't see this option on your EMIS then you probably don't have sufficient permissions on your EMIS role.
In that case, try and share this with your practice manager to follow the steps in this article for you.
Activate Application
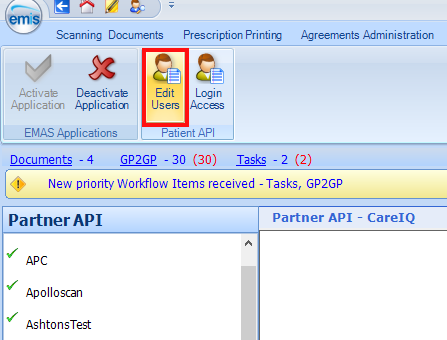
Whilst on the EMAS Manager page, head over to "Partner API" at the bottom left.
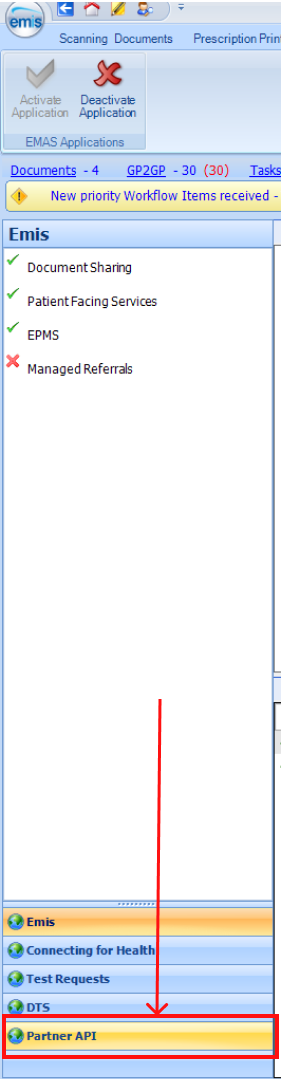
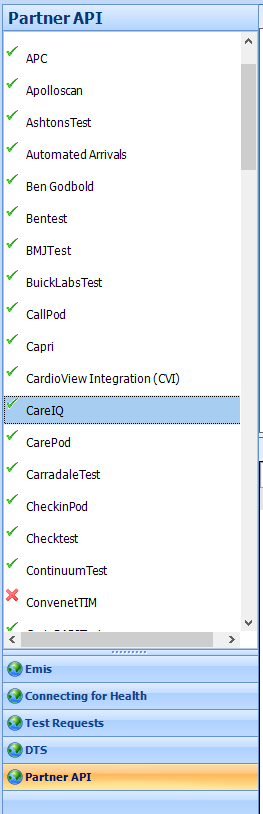
You'll be able to find CareIQ on the list of Partner API applications on the left.
Once you've found it just click on "CareIQ"
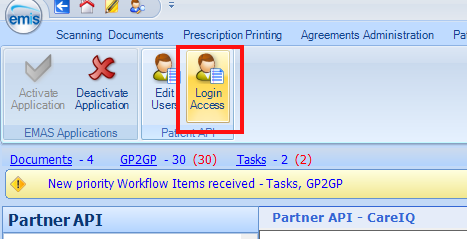
Click "Activate Application" if it's not already activated

User Setup
The following set of steps will need to be repeated every time a new user needs to have access from CareIQ into EMIS
Staying on the same page - click on "Login Access"
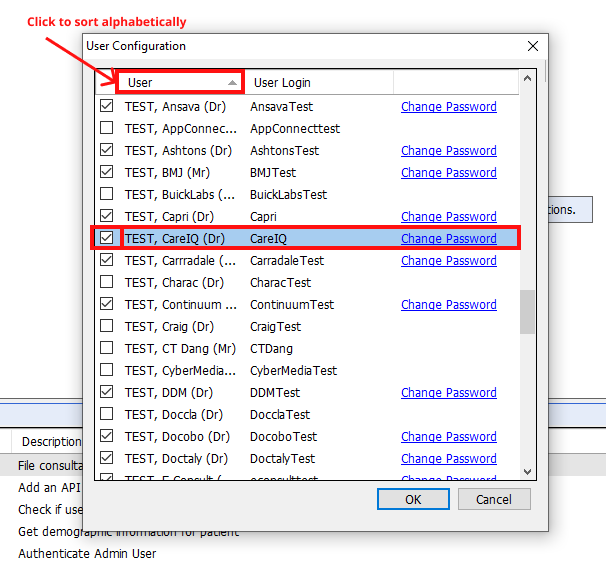
Click the "User" header to sort the list of users alphabetically
Then tick the two boxes "Auto Login" and "Allow Login" next to each user you want to enable
If a user appears twice in the list, we recommend ticking the boxes for both accounts
Once you're done click "OK" to submit

Staying on the same page - now click on "Edit Access"
Click the "User" header to sort the list of users alphabetically
Then do the following for each user you want to enable:
- Tick the box to the left of their name
- Click "Change Password"
If a user appears twice in the list, we recommend ticking the boxes for both accounts
Once you're done click "OK" to submit
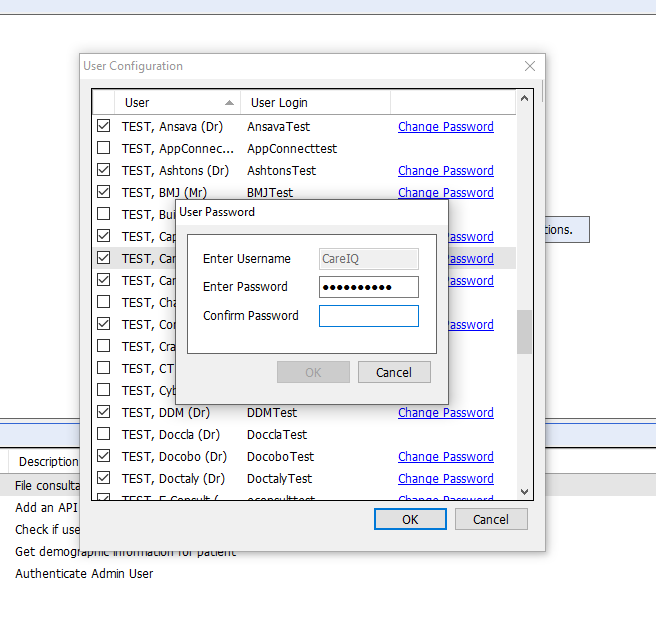
You'll be asked to create a password.
Don't worry, you won't need it again.
You will need to meet EMAS Manager's password requirements to be able to click on the "OK" button.
Awesome!
You've made it to the end.
You should be all set to start using CareIQ to its full extent.